At-home STEM Activities: DIY Wave Pendulum
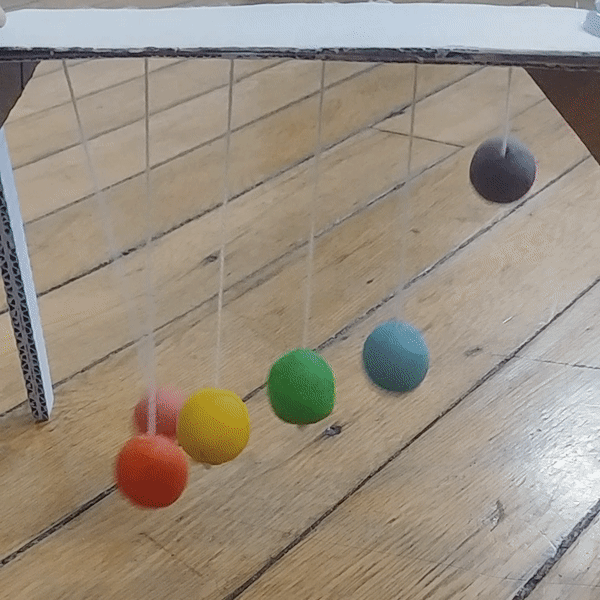
Have you seen the wave pendulum at the Discovery Center? It features golf balls hung from different length strings, and when you pull all the balls back at the same time, they swing back and forth at different rates. As they swing, they seems to form a wave shape. The way it works is almost like magic, but there’s no witchcraft involved—just physics!
Since we can’t go to the Discovery Center’s wave pendulum right now, let’s make our own to play with at home!
DIY Wave Pendulum
Materials:
Oven-bake clay
Aluminum foil
String
Cardboard
Hot glue gun and glue sticks
Ruler
Scissors
Pin or other sharp object
Paint (optional)
Instructions:
1. Roll the oven-bake clay into six balls, about 3/4 inch in diameter. Use the pin to poke holes through the clay balls. Bake according to package instructions.
No oven-bake clay? You can use beads, nuts, or any other small object with a little heft that you can tie a string through.
2. While the clay bakes, cut two 7 inch-by-2 inch cardboard rectangles. On one rectangle, mark the middle of the rectangle width-wise, and mark every inch length-wise. Poke a hole with the needle where these lines meet. If you want, paint the cardboard.
3. Cut eight 8 inch-by-0.5 inch rectangles. Glue four pairs of rectangles together, so that you have four thicker cardboard rectangles. Create v-shapes by trimming the corner off each rectangle and gluing two together, as shown below. Paint, if you would like.
4. Once the clay is baked and cooled, paint the balls, if you would like. Cut six pieces of string longer than you will need, about 10 inches each. Put each clay ball on a piece of string and tie a knot so the balls don’t slip off the end. Put each piece of string through one of the holes you made in the cardboard rectangle in step 2. Tie a knot on each string so that the lengths of strings go in order from longest to shortest at the following lengths: 4.75", 4.25", 3.75", 3.25", 2.75", 2.25"

5. Glue the two cardboard rectangles together, sandwiching the knots in between. Glue the legs on. For more support, you can glue triangles from the legs to the top.

Done—use another piece of cardboard to pull back all the balls at the same time, let them go and watch this kinetic art piece go!
How does this work?
The amount of time it takes for a pendulum to swing back and forth one time is called its period (T). A pendulum’s period is only based on the length of its string and gravity, which on Earth is 9.8 m/s^2. The formula for period is
T = (L / g)^1/2
So, in our wave pendulum, since each string is a different length, each pendulum swings at a different rate, and since the difference between the lengths is so small, the difference between the periods is also small. This leads to the wave pattern that we see as the pendulums move.
Take this activity further by calculating the period for each pendulum!